Hi crafty friends!
Thank you SO much for spending some time with me on my blog. I have been struggling a lot with cardmaking lately… I haven’t been able to make a card that I actually liked for a few weeks now. Has this ever happened to you? I really wanted to craft and had lots of ideas. They just didn’t turn out the way I wanted them to…
So after a LOT of debating over colors, possible sentiments and stamped images, I was happy with how this card turned out. I made a little tutorial for you, so you know how this card came together. Let’s dive in!

All supplies are Lawn Fawn. You can find a full collection link here.
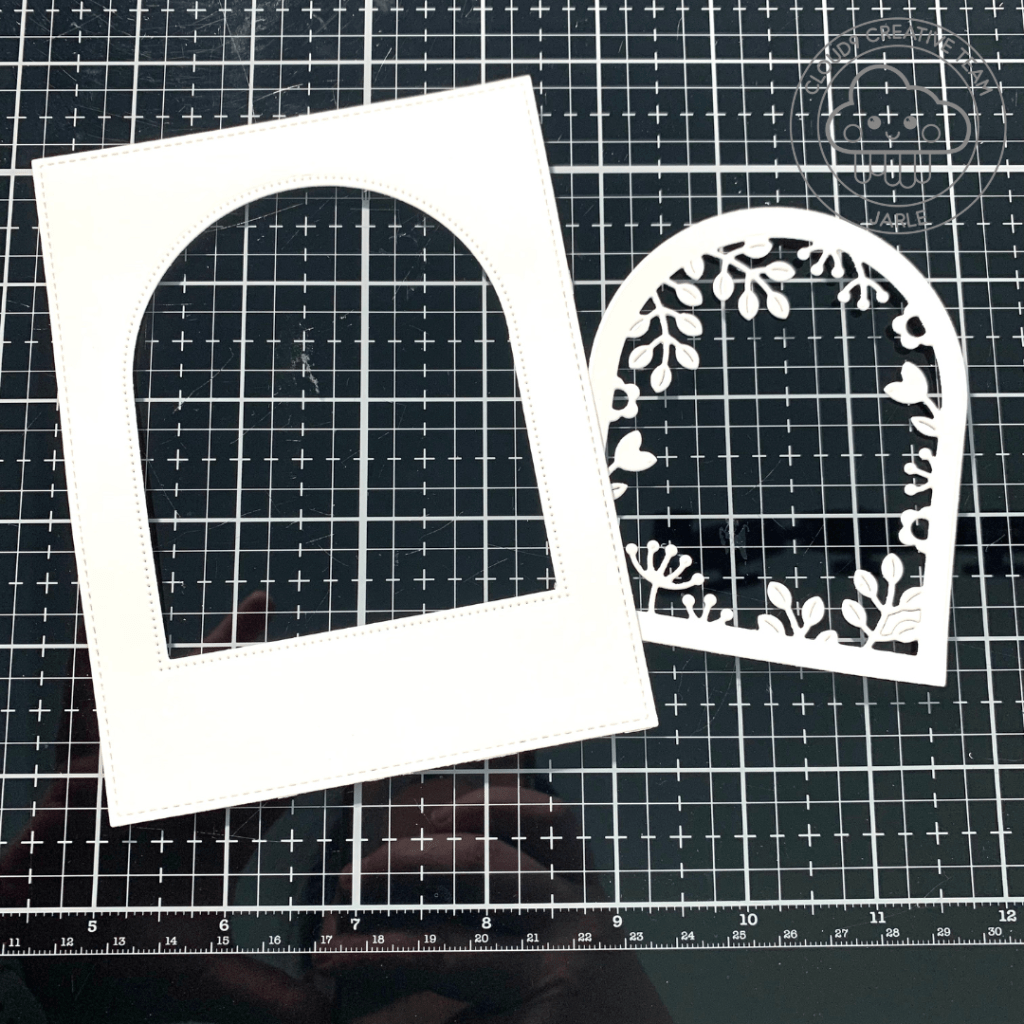
I started by die cutting a large stitched rectangle out of Bristol Smooth cardstock. I took the biggest die of the Secret Garden Window and die cut a window out of the Bristol Smooth card panel. I used the panel that comes out after the die cutting for my ‘floral scene’. So I die cut the floral die out of that ‘scrap piece’ of Bristol Smooth cardstock. I hope this makes sense. You can see the 2 pieces in the picture below.
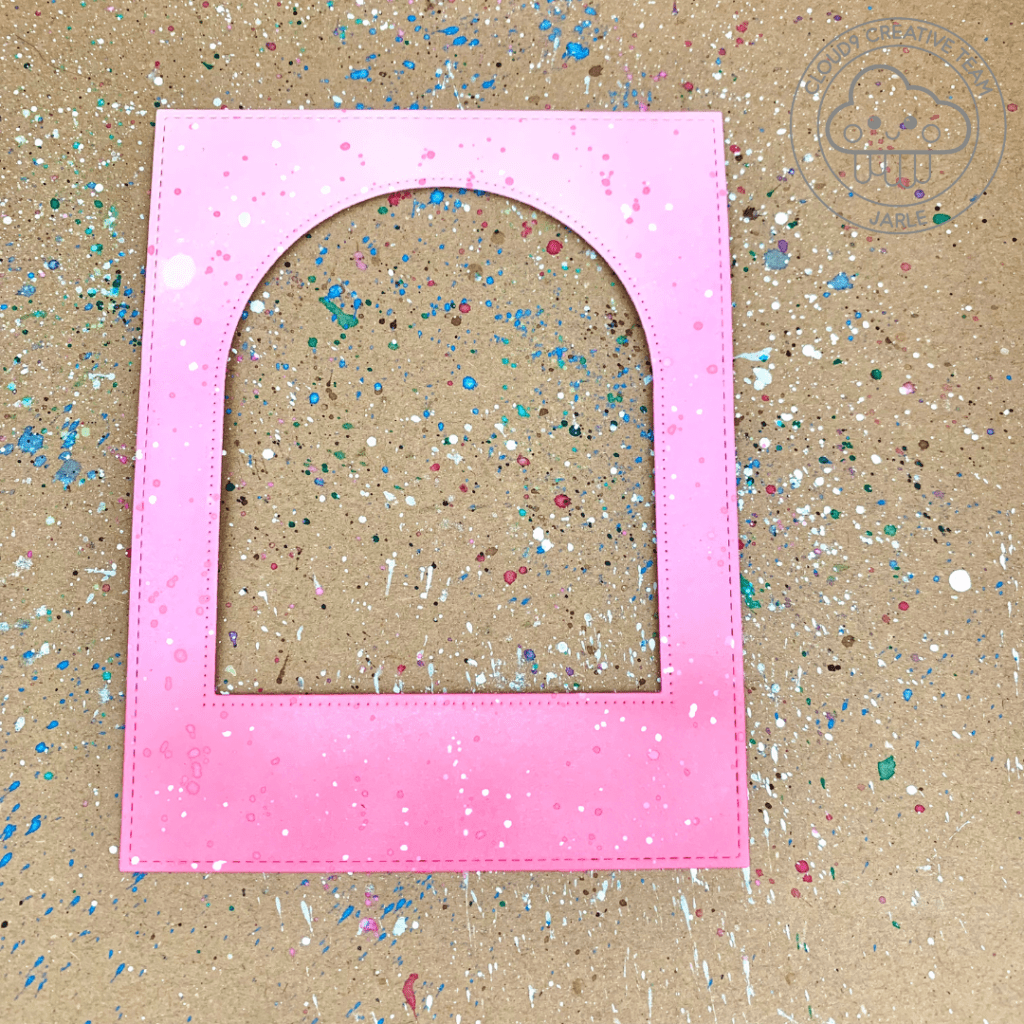
After that I could start my ink blending. The large panel was inked with Distress Oxides in the colors Spun Sugar, Kitsch Flamingo and Picked Raspberry. I splattered on some Copic White as well as some diluted Picked Rasberry. It kinda looked like the Spiffy Speckles paper, so if you don’t feel like inking, you can always use this patterned paper 🙂
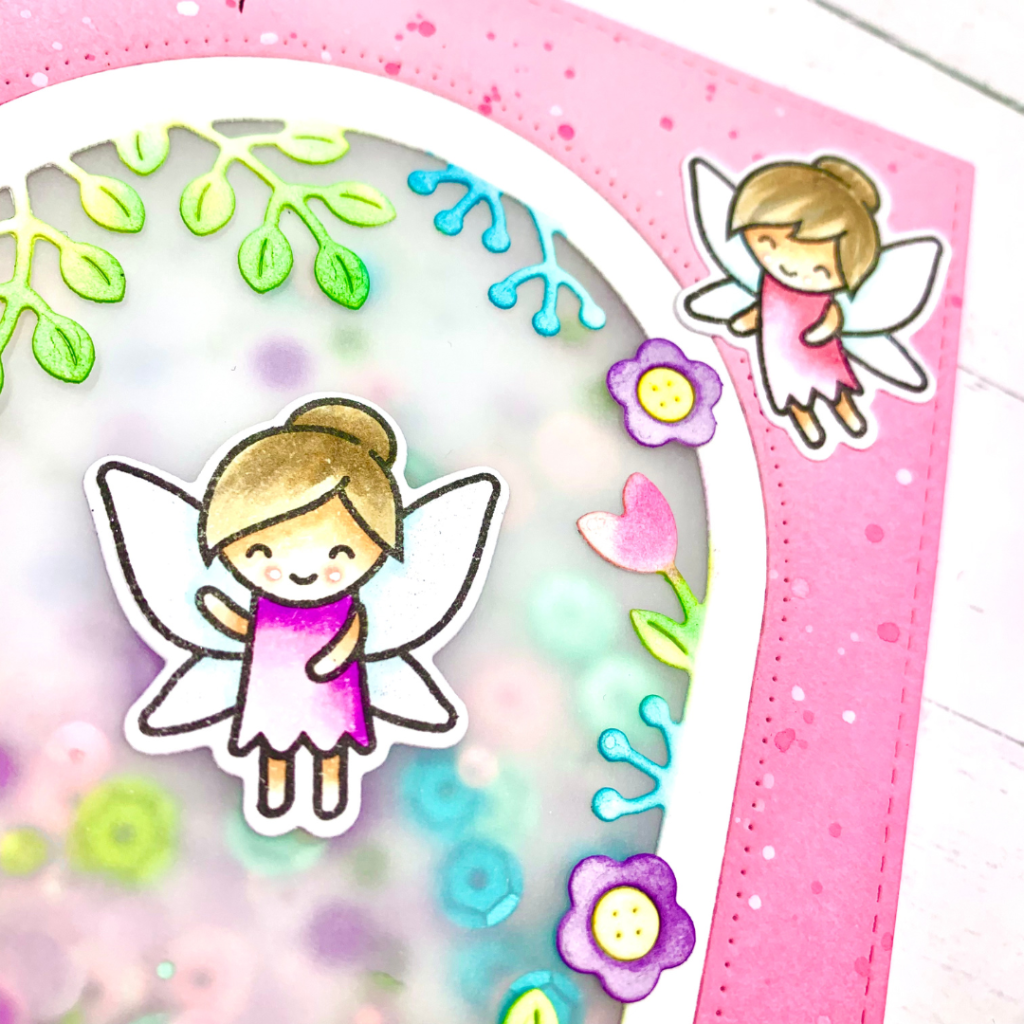
I did spend some time inking the floral frame. I went in with 1 color on 1 floral at a time and I masked off the edges with Heffy Doodle Memo Tape. The colors I used are: Twisted Citron, Evergreen Bough, Mermaid Lagoon, Villainous Potion, Saltwater Taffy, Picked Raspberry and Mustard Seed. I know… Lots of colors for such small florals, but I wanted a bit of a gradient.

At this point I decided I wanted to make it into a shaker card. I took my 2 panels and adhered them together with scotch tape. Then I took a little piece of vellum and adhered it onto that scotch tape as well. You can of course always use acetate, but the vellum gave it a more subtle look. To create my well, I used Heffy Doodle foam tape (which is a little bit thicker, so ideal for shakers) and the 2 sequin mixes Cloud 9 and Tutti Frutti. I removed the liner paper from the tape and pressed down a beautiful paper from the What’s Sewing On paper pad that I cut to the same A2 size.
Tip: Rub your antistatic powder tool against the edges of the foam tape to prevent the sequins from sticking to it. More chance that your sequins can move around freely!


I stamped 3 little fairies from the Fairy Friends stamp set on Transotype Perfect Coloring paper with Lawn Fawn Jet Black ink. I colored the 3 images and die cut them with the coordinating dies.
I listed the Copic combinations for you:
- Wings: B00 – B0000 – 0
- Hair: E44 – E43 – W5 – E42
- Face: E11 – E00 – E000
- Dress:
-
- R83 – R81 – V000
-
- V04 – V01 – V000
For my sentiment, I stamped the Happy Mother’s Day from the Happy Happy Happy stamp set on that same Transotype paper with Versamark ink. I sprinkled on some gold embossing powder and heat set it with my heat tool. Then I took a sentiment banner and die cut the pretty gold sentiment.

I adhered the sentiment and the 3 fairies onto my card panel with liquid glue. I also added a subtle touch of glitter on the fairies’ wings with a glitter pen.
This finishes off my card. I really hope you like it as much as I do. Thanks again for stopping by! I hope you have a great day!
Love, Jarle x
