Hi crafty friends!
I’m happy to be back with a slimline card today. I made this one for Cloud9 Crafts store and used a few items from the latest Lawn Fawn Summer Release. You can find a full supply list here.
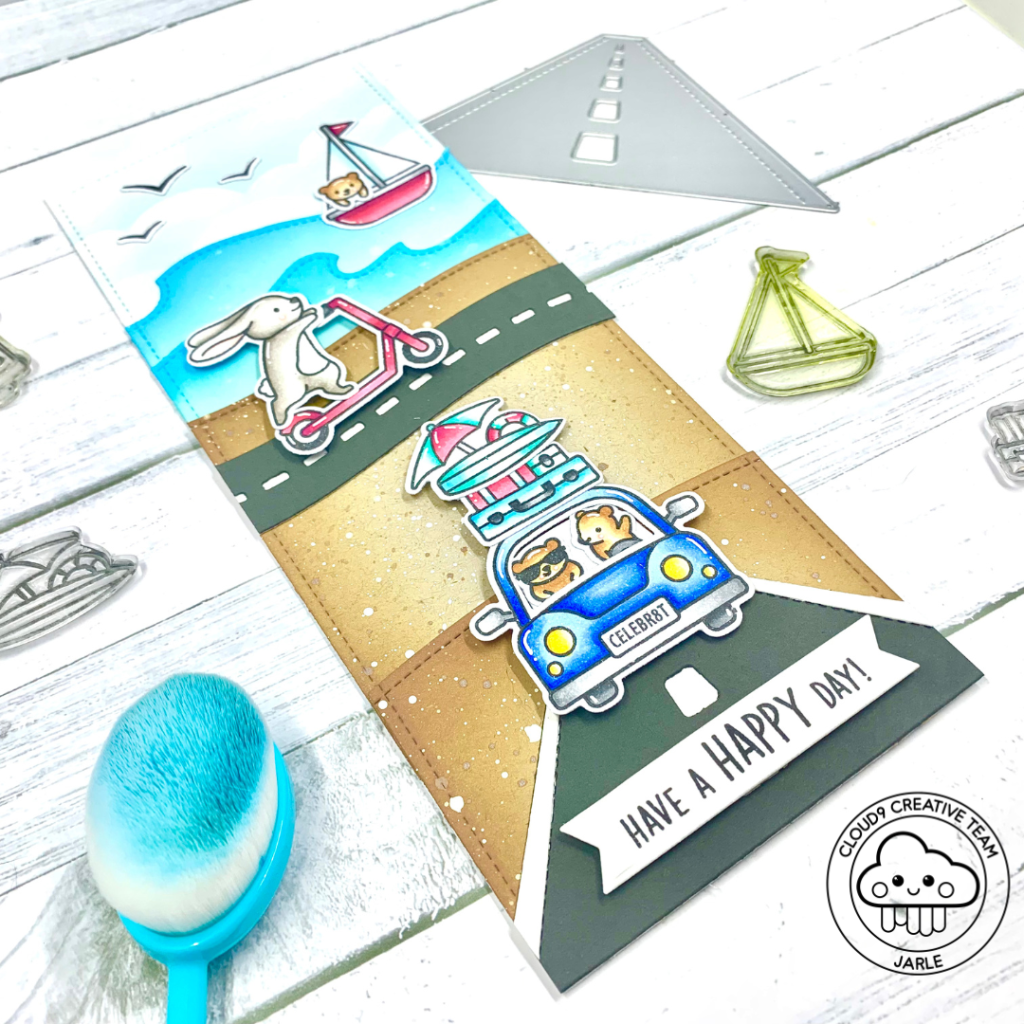
Let me tell you how this card came together.

I started by die cutting all my cardstock. I sketched this card on my iPad so I knew which items I wanted to include. This made it easier to know which cardstock layers I needed.
I started with my base. I die cut this out of Bristol Smooth cardstock with the Large Slimline Rectangle from Lawn Fawn. I also die cut some Kraft cardstock with that same slimline die and also another small piece of Bristol Smooth cardstock for my waves.
That smaller Bristol Smooth cardstock piece was then die cut again with 2 Wavy Borders. The slimline rectangle in Kraft cardstock was die cut once with a simple stitched hillside border and the other piece was die cut with a regular stitched hillside border.
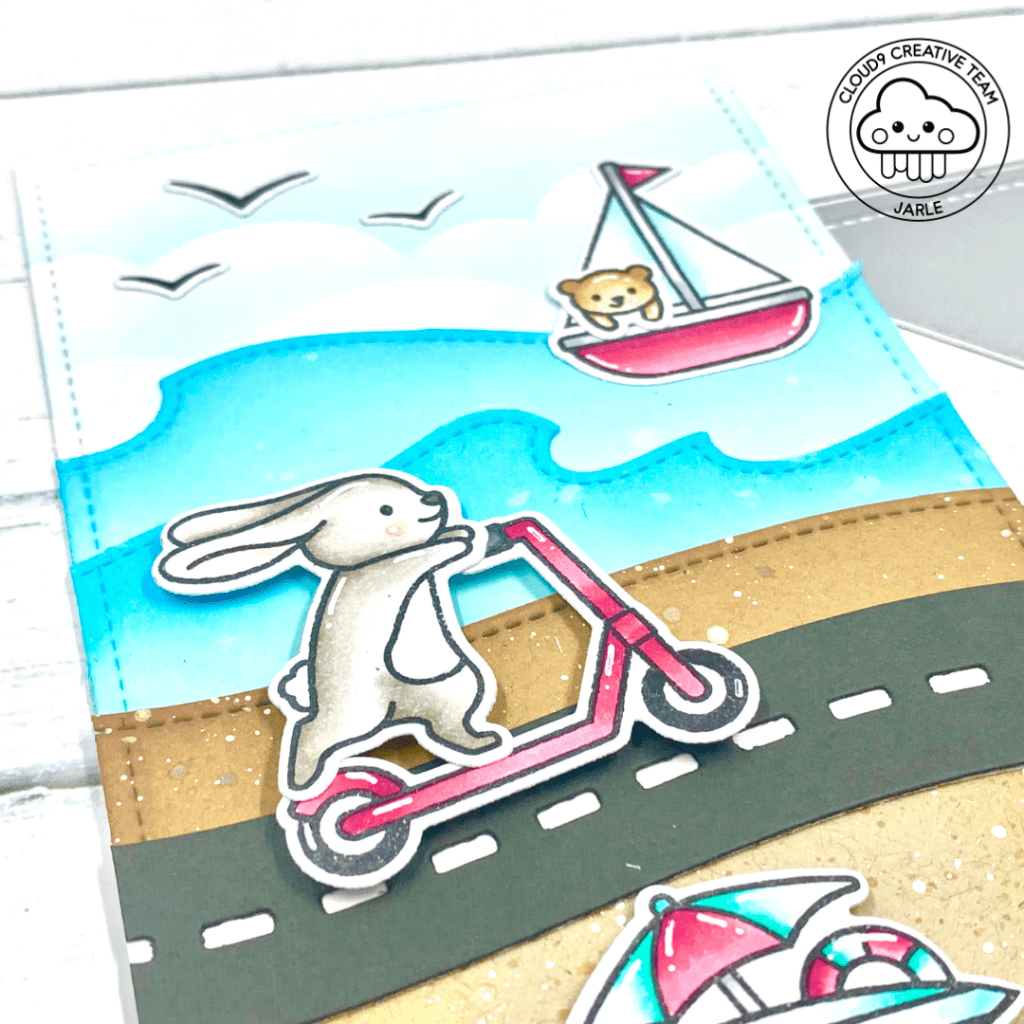
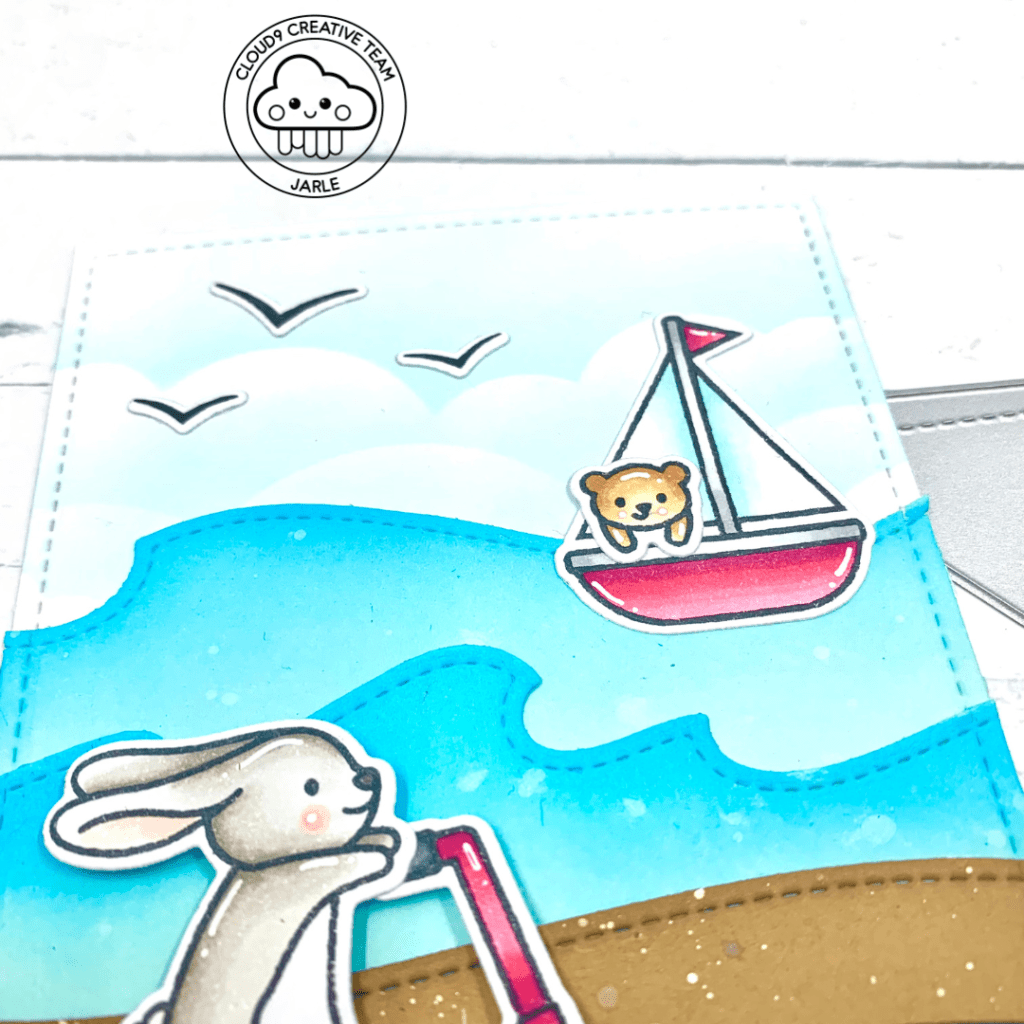
To get all the layers right, I went over to my ink blending. I started with the whole slimline ‘base’ panel. I ink blended the top half with a cloudy stencil from MFT and Tumbles Glass Distress Oxide.
After that I took my 2 pieces for my waves and blended on the Salvaged Patina. On the edges I went in with Salty Ocean. I splattered some water on the waves for added interest.
The 2 pieces of Kraft cardstock were both inked with Vintage Photo Distress Oxide. I diluted some of that ink with water on a stamping block and splattered on both of the blended pieces. I did the same thing with Copic White: diluted it with water and splattered it on the 2 ‘sandy’ pieces.
After that, I die cut 2 roads from Storm Cloud and regular white cardstock. I did one with the new On The Road and one with the older Road Border. I adhered down all the pieces so I had 2 roads to integrate on my slimline card.
At this point all my layers of cardstock were prepped.
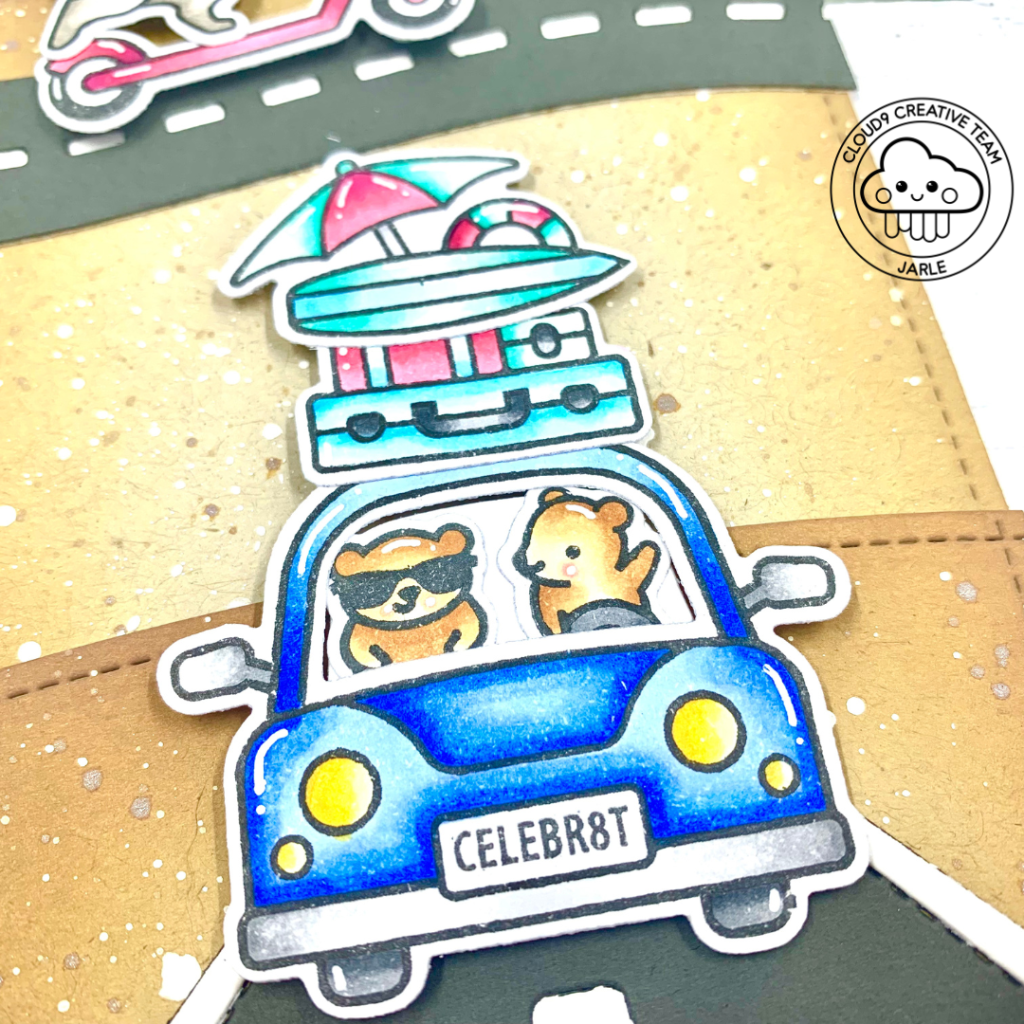
Time to stamp and color the images from Smooth Sailing, Scootin’ By, Car Critters and Car Critters Road Trip Add-On. I stamped them on Transotype Perfect Coloring paper with Lawn Fawn Jet Black ink. After letting it dry for about 5 minutes I colored the images with my Copic Markers. After that, I die cut them with the coordinating dies.
The colors I used are listed below:
- Car: N6 – N4 – N2 / N6 – N4 / B26 – B23 – B21 / Y17 – Y15 – Y13
- Bears: E33 – E51 – E50
- Bunny: W4 – W2 – W00 / R30 – R0
- Accessories car: BG13 – BG11 – BG10 / B02 – B00 – B000 / RV17 – RV14 – RV13
- Boat: RV17 – RV14 – RV13 / N2 – N0 / B00 – B000 – 0
Time to assemble the card. I started with my base and I just adhered all my cardstock pieces on that slimline base. Then I put down all my images. The boat and birds were adhered flat with liquid glue. The other images were put down with foam squares. This adds lots of dimension!
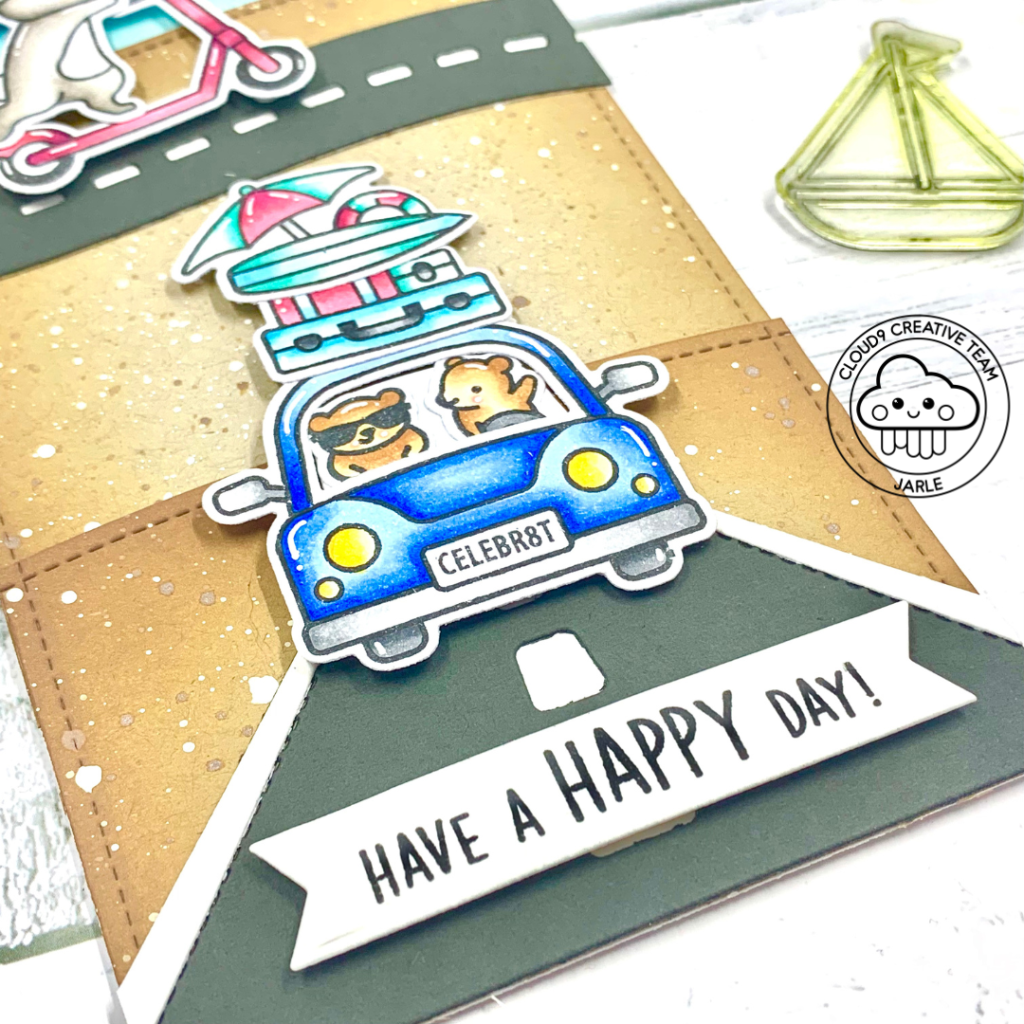
To finish it off, I stamped my sentiment from Scootin’ By on regular white cardstock and I die cut it with an Everyday Sentiment Banner. I added it to the bottom of my card.
I adhered my card panel on a white card base and it was all finished.
I’m very happy with how it turned out and I hope you like it too!
Thank you so much for being with me today. Happy crafting!
Love, Jarle x
